
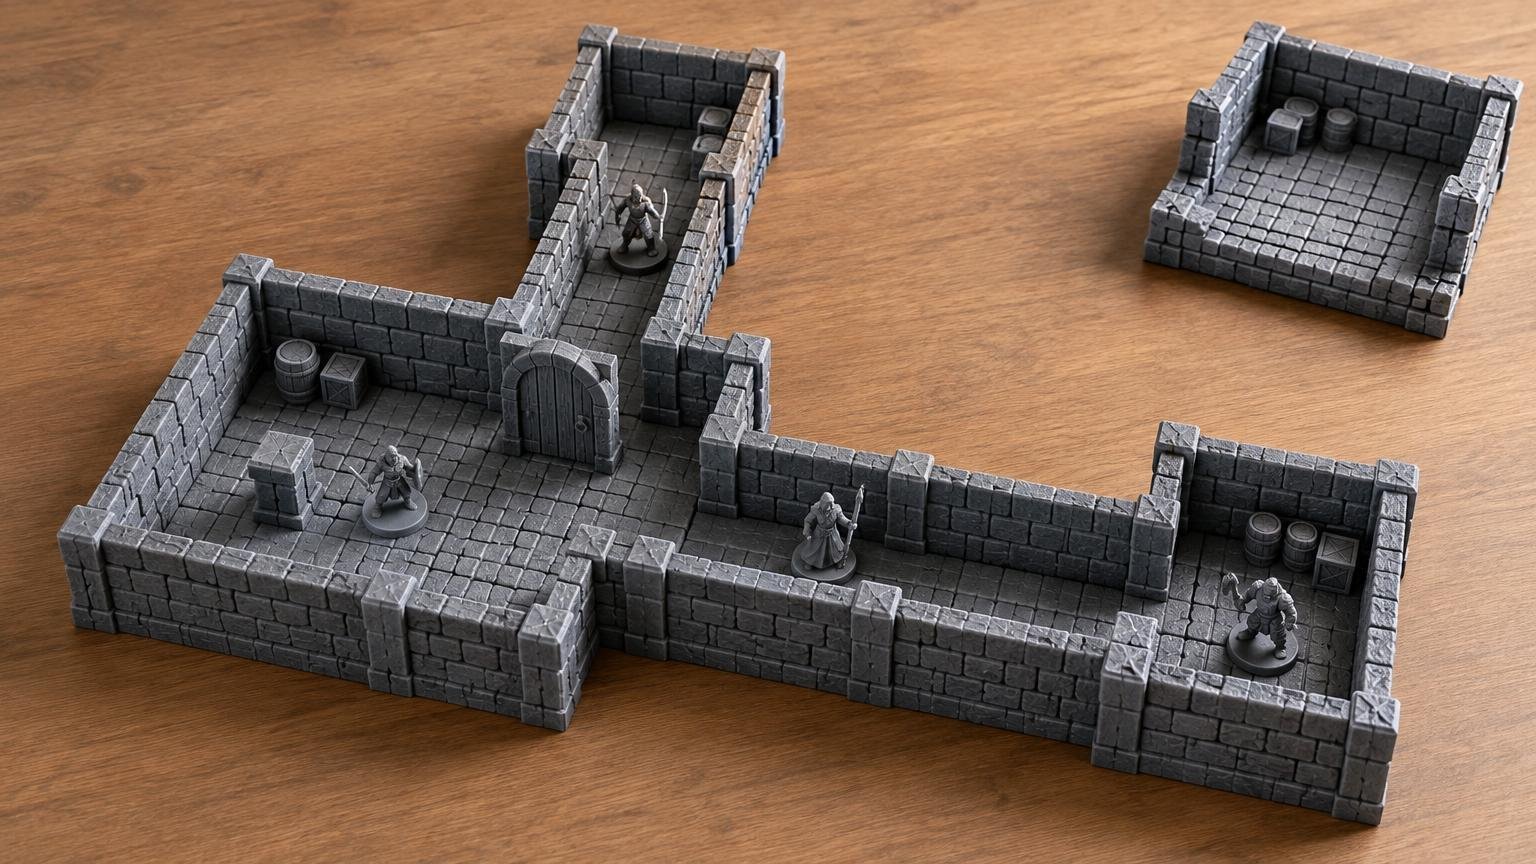
A small dungeon succeeds when the part currently on the table remains playable, reachable, and easy to understand. The goal is not to reproduce the entire map at once. It is to give the players enough physical terrain to make meaningful decisions while keeping unexplored areas, session materials, and unused modules out of the way.
That makes planning a modular dungeon layout for a small gaming table an exercise in space management. Start with the area people can comfortably use, establish a compact vocabulary of reusable rooms and passages, and reveal new sections only when play reaches them. Decorative detail comes later, after movement, miniature access, and sightlines work.
Start with usable table space, not total table size
Measure the surface available during an actual session rather than relying on the table’s advertised dimensions. Character sheets, dice trays, drinks, books, initiative trackers, and elbows all consume space. A table that is 36 inches wide may provide a much narrower practical terrain area once players sit around it.
Reserve a separate staging area for the next room, hidden creatures, doors, and encounter dressing. This can be a narrow strip along an unused table edge, a side table, a shelf, or trays placed below the table. Do not count that staging area as playable dungeon space.
Three broad layout methods work on a constrained surface:
- Single encounter board: Build one room and its immediate approaches. Replace it when the party moves to a different location. This offers excellent access but weakens the physical sense of a connected dungeon.
- Expanding dungeon: Begin with a small entrance area and add rooms as they are discovered. This preserves spatial continuity, but previously explored sections may eventually fill the table.
- Swap and stage: Keep the current room plus one adjacent section in play, then remove areas that no longer affect decisions. This is usually the most flexible approach when space is severely limited.
Whichever method you choose, leave at least one clear approach toward the center of the active zone. That access lane does not need to be empty terrain. It simply needs to avoid tall, fragile, or frequently moved features that make reaching the central miniatures awkward.
Choose room and corridor footprints around miniature positions
Plan rooms by asking how many miniature positions they need, not how much decorative floor looks impressive. A chamber may need space for a party to enter, several opponents to occupy distinct positions, and one or two terrain features that influence movement. If every floor position is filled by furniture or scenery, the room is visually rich but difficult to play.
Grid users can sketch in squares, while gridless groups can use base-sized paper circles or cardboard templates. D&D’s current basic rules use a square-grid convention in which one square represents 5 feet, but that is a D&D-specific play convention rather than a universal terrain requirement. The D&D Beyond basic rules explain the square-grid movement model. If you use miniatures with different base sizes or another rules system, plan around those physical pieces instead.
A reusable collection does not need dozens of unique room shapes. Begin with a limited vocabulary: a compact chamber, an elongated chamber, an L-shaped area, straight passages, corners, junctions, dead ends, and separate thresholds or doors. These components can imply a much larger range of maps when rotated and combined.
Corridor width should reflect the decisions you want the passage to create. A narrow corridor can produce a controlled approach, restrict passing, and focus attention on a doorway. A broader passage allows miniatures to move around one another and gives the GM more room for obstacles or opposing creatures. Neither is inherently correct. Check how your rules handle occupied spaces, passing, reach, and large creatures before committing to repeated corridor dimensions.
Also account for walls that consume physical space. A room with a nominal grid footprint may offer fewer comfortable miniature positions once thick walls, columns, door leaves, and textured edges are present. The interaction among floor grids, wall placement, and connectors is covered in more detail in this explanation of modular dungeon tiles. Scale should likewise be checked against actual bases, poses, doors, and wall clearances rather than a miniature-height label alone; see the terrain scaling framework for 28mm, 32mm, and one-inch-grid games.
Protect miniature access, visibility, and table comfort
Hands are part of the layout. Doors, creatures, condition markers, and interactive objects will be touched repeatedly, so put them where players or the GM can reach them without dismantling nearby scenery. A beautiful central altar becomes a nuisance if every interaction requires reaching through an archway or between tall walls.
Keep frequently handled scatter removable. Chests, rubble piles, tables, pillars, and barricades can define an encounter, but they should be easy to lift temporarily when someone needs to place a miniature. If an object represents terrain with a rules effect, make its occupied area visually clear. A scenic element that looks passable from one side and blocked from another creates unnecessary arguments.
Wall height and density affect both atmosphere and physical visibility. Full-height walls can create a convincing enclosed space, but they may conceal miniatures from seated players and complicate access. Lower walls, open corners, removable wall sections, or selectively wall-free edges sacrifice some visual enclosure in exchange for easier play.
Physical visibility is not the same as rules-based line of sight. A player might be able to see a miniature over a low terrain wall even when the game rules say the characters cannot see through that boundary. Conversely, a tall model may physically block the player’s view without blocking the character’s line of sight. Establish which walls and objects have game effects before the encounter begins.
Inspect the layout from every occupied seat. Look for miniatures hidden behind walls, doors whose openings cannot be seen, and central spaces that require an uncomfortable reach. Rotate a room or remove one wall section if doing so makes the encounter easier to read. Terrain should clarify the situation, not turn basic positioning into a guessing exercise.
Build more encounters from a limited modular vocabulary
Reusable dungeons are easier to plan in layers. Start with the playable floor footprint. Add walls, doors, and thresholds. Introduce only the encounter-defining features next, such as a bridge, central pillar, barricade, elevation change, or hazardous patch. Finish with thematic dressing, creatures, clues, and objective markers.
This order prevents decoration from deciding the layout prematurely. The same neutral chamber can become a guardroom with tables and weapon racks, a shrine with an altar, or a flooded ruin with stepping stones. Movable dressing creates variety without requiring a dedicated floor or wall set for every scene.
Before the session, trace the intended route using the modules you actually have. Count straight passages, corners, junctions, doors, open floors, and unusual transitions. A drawn map can contain geometry that is surprisingly expensive in physical pieces, especially when several branches require the same corner or doorway at once.
Do not build every room just because the map includes it. Prioritize spaces where physical positioning improves the encounter: complicated fights, rooms with interactive cover, branching exploration points, traps that depend on location, or scenes where elevation matters. A simple connective chamber can be described verbally and represented by a corridor segment until a tactical layout becomes useful.
Reveal rooms without exposing the entire dungeon
Revealing a physical dungeon requires a different workflow from drawing a complete map. The GM needs to control information without spending several minutes constructing every doorway after it is opened.
Section-by-section placement provides the strongest concealment. Keep the next one or two modules assembled on trays and move them onto the table when discovered. Aligning complete sections is faster than carrying individual floor and wall pieces into place, and creatures can remain off the tray until they become visible.
Prebuilt-and-covered terrain is faster to reveal but occupies more table space. It can also disclose the outline of hidden chambers if a cloth or card cover creates an obvious raised shape. Flat paper masks work better than bulky covers for low terrain, while genuinely secret rooms are usually best kept off the table until discovered.
A reconfigured encounter area gives up persistent geography in favor of efficiency. Remove completed rooms and rebuild the active zone as the party advances. Keep a simple sketch or photograph of prior positions if the group might retreat. This method is especially useful for a long, mostly linear dungeon on a very small surface.
Digital tabletops distinguish between areas a GM manually reveals and visibility revealed through automated systems. Roll20’s Fog of War documentation describes that distinction. Physical terrain does not automate vision, but the same planning question applies: decide whether discovery is controlled by entering a section, opening a threshold, or establishing a character’s view into the next space.
Stage branches separately and avoid placing undiscovered monsters on visible side trays. If a doorway reveals only part of a room, place the room shell first and add occupants as they come into view. Hold secret doors, hidden passages, and the modules behind them away from the active layout so their physical outlines do not spoil the discovery.
Hypothetical layout example: a 20-by-16-inch active zone
The following is a planning illustration, not a product layout or universal standard. Imagine a 36-by-30-inch table with a 20-by-16-inch active terrain zone. The remaining surface is reserved for players, session materials, and a small staging area. For easy arithmetic, this example uses a one-inch square grid.
Place a 6-by-4-square entry chamber along the near edge. From the center of its north wall, a 2-by-3-square corridor leads to an 8-by-6-square junction room. This creates a readable progression from arrival, through a narrow transition, into a room with multiple choices.
From the junction room, add a 3-by-2-square passage to the west, ending at a side chamber with a 3-by-6-square footprint. On the east side, use a 2-by-2-square passage leading into a 6-by-4-square room rotated so its four-square dimension runs east to west. A north exit from the junction remains closed until the later section is required.
These components can fit across the 20-square width by placing the west chamber’s three-square width at the far left, the three-square passage beside it, the eight-square junction in the center, the two-square east passage next, and the rotated room’s four-square width at the far right. The widths total 3 + 3 + 8 + 2 + 4 = 20 squares. The junction, side chamber, and rotated east room can share the same six-square depth band.
Only the entry chamber, northbound corridor, and junction need to appear initially. The west and east branches can wait on separate trays. The unrevealed northern section remains completely off the active zone, leaving a three-square-deep strip beyond the junction for access, temporary markers, or the first part of the next connection.
The point is not that these are ideal room dimensions. The useful features are the proportional changes, central decision point, clear thresholds, reachable outer branches, and reserved route for later expansion. If your miniature bases, party size, walls, or rules demand more space, preserve that planning logic while changing the measurements.
Plan the next session from access inward
Begin by reserving space for players, hands, and staging. Define the active terrain footprint second, choose a small set of reusable room and corridor shapes third, and add walls or dressing only after miniature movement remains clear. Finally, decide exactly when each hidden section enters play.
A compact dungeon can feel larger than the table when branches are staged, previous areas are removed deliberately, and neutral modules take on new roles through movable details. Before the session, perform one final check from every seat: reach the central room, move the largest expected miniature through each threshold, and confirm that unexplored modules reveal neither their shape nor their occupants. If those checks work, the layout is ready to support play rather than compete with it.
Frequently Asked Questions
How much table space should I reserve for a modular dungeon?
Reserve space for character sheets, dice, drinks, books, elbows, and a separate staging area first. Use only the remaining comfortably reachable surface as the active terrain zone.
How wide should a dungeon corridor be for miniatures?
Choose width according to the decisions you want the corridor to create. Narrow passages can restrict passing and control approaches, while broader passages support maneuvering, obstacles, and larger creatures. Check the rules and miniature bases you actually use.
Should I build the entire dungeon before the session?
No. Build or stage the sections likely to matter, especially tactical rooms, branching points, and location-dependent traps. Simple connective spaces can be described or represented with a basic corridor until a full layout becomes useful.
How can I keep players from seeing unexplored rooms?
Keep upcoming modules on separate trays or off the table, then place them when discovered. Secret rooms and hidden occupants should remain away from visible staging areas so their outlines do not spoil the reveal.
How should I plan a modular dungeon for gridless play?
Use base-sized paper circles or cardboard templates to test movement, spacing, doors, and wall clearances. A one-square-equals-5-feet grid is a D&D-specific convention, not a universal terrain requirement.